Wednesday, December 19, 2012

Final Drawing Projects

So it's been about a month since I came home from SCAD for winter break, but I've still got some stuff from school to put up here. Finals week was crazy and stressful, but I somehow managed to get all my work done on time and still do very well. That's probably only because I got four hours of sleep or less for 5 nights in a row, but I got through it and I have to say that I loved every second of my first quarter at SCAD. I'm actually surprised at how badly I want to go back, despite how much I love being home and seeing family. I'm certainly not rushing things though, because I'll be back there soon enough. 

Anyways, here are the pictures of my final projects for my drawing class. I'm pretty happy with the way the perspective drawing came out, although if I had more time I would have liked to put in more detail:


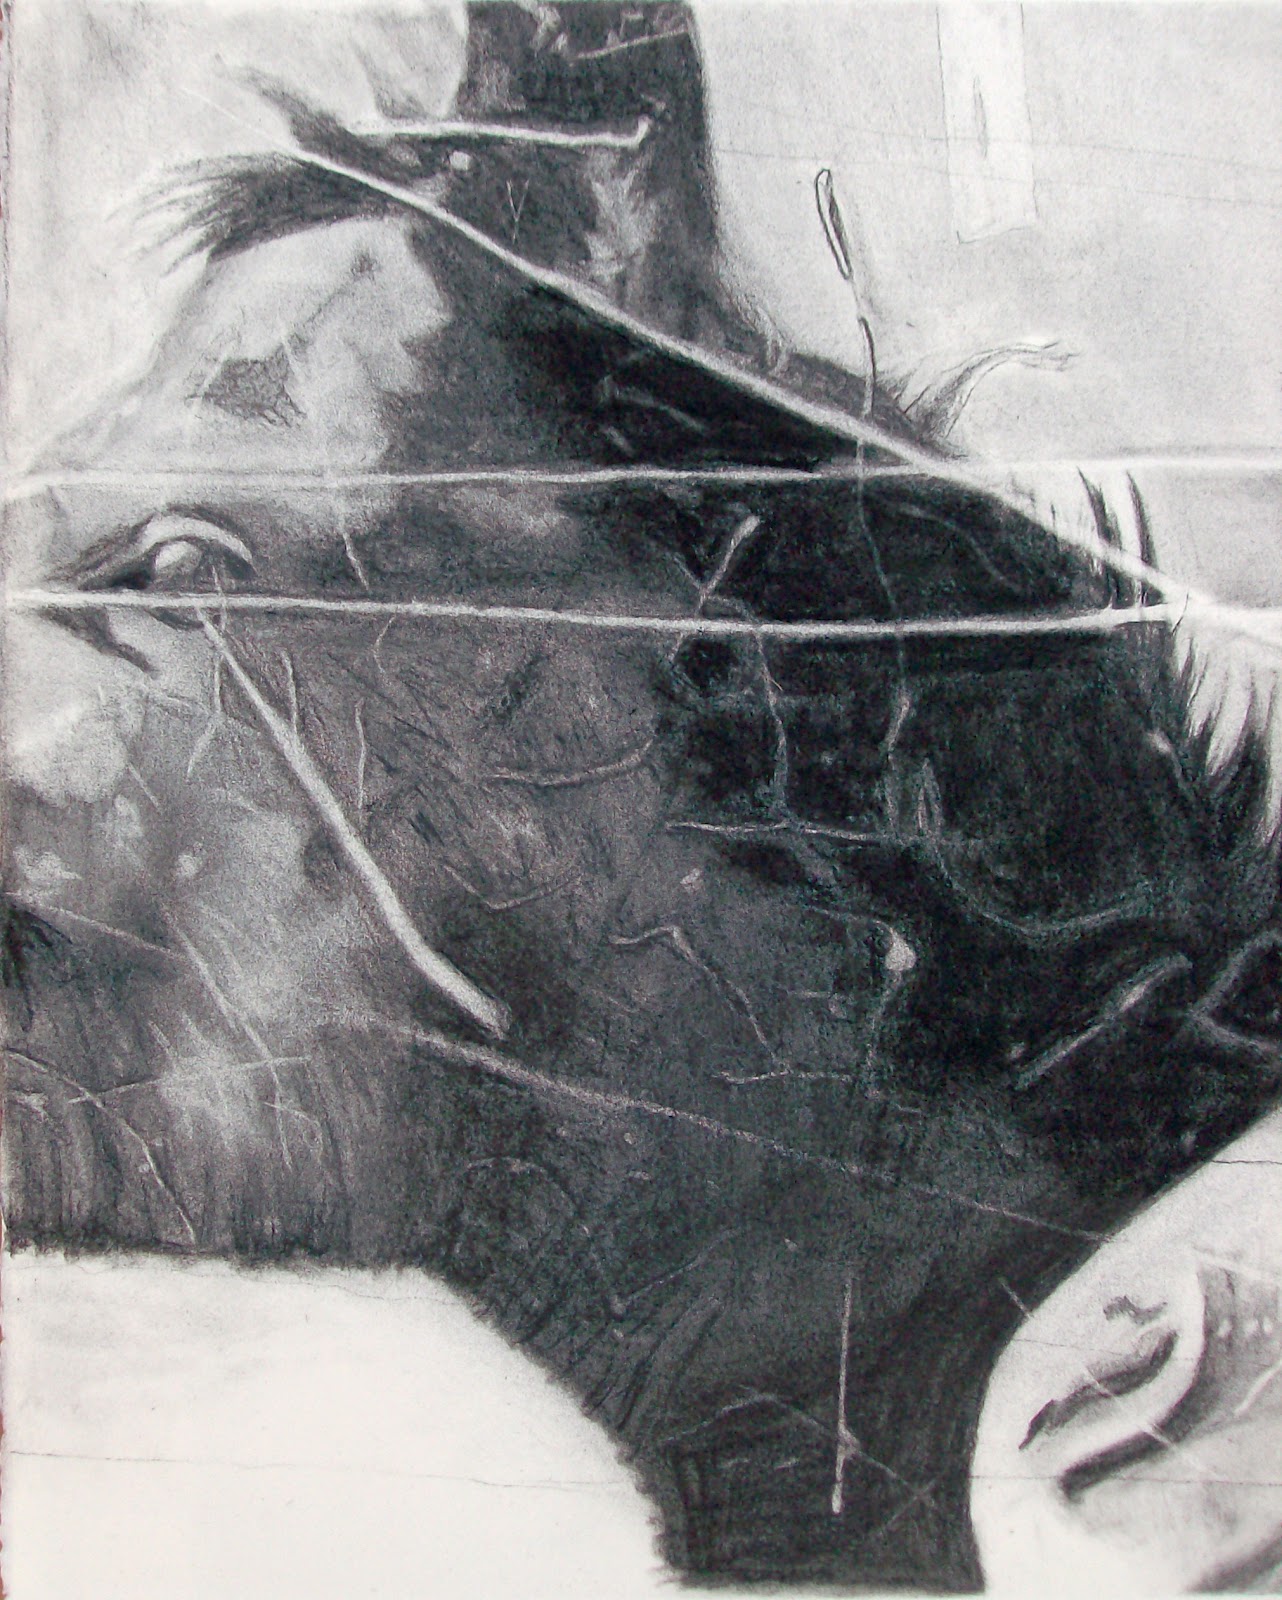
For my other final project, I had to pretend that I was a toy, and then draw a scene from the toy's perspective. It took me a long time to come up with a good idea for this project, and I think it came out alright, but there were still lots of things I wasn't happy with. I definitely felt like I could have spent a lot more time on this one, but that wasn't really an option with all of the other finals work I had to do. I really enjoyed doing this project though, because my teacher let us choose whatever medium we wanted. I picked black and white charcoal on toned paper.


Friday, November 2, 2012

Another Full Value Drawing!

So here is another full value drawing from my drawing class. However, this time it's a still-life and it's drawn from direct observation rather than from a photo like my horse drawing. It took me about 12 hours to draw, which basically means I spent a whole weekend in my drawing classroom! But it was worth it because I really like the way it came out.


Wednesday, October 31, 2012

Halloween-Themed Drawing Project

So here's a special Halloween treat! Well, not really that special, what I'm working on just happens to coincide with Halloween. The current design project that I am doing for class is centered around a fall theme. We had to draw 10 "things" that had to do with a certain fall subject, so I drew a bunch of scarecrows and pumpkin heads/jack-o-lanterns. It was pretty fun. Here are the sketches that I did:


Here are the inked and scanned final images. I drew more than 10, but I either cut out or edited 6 of them for the final project. You'll get to see that later. Anyway, here are the inked drawings:


Monday, October 29, 2012

3 Value Still Life

For this assignment, I had to draw the same still-life as in my previous post, but this time I had to use 3 values: black, white, and gray. The same rules applied as far as finding a good composition based on the rule of thirds and the distribution of value.

I had to do the same process for this assignment too. One had to be in charcoal:


The other had to be made of cut paper. It was more challenging to do the black and gray cut-outs, because if the black shapes were glued on in a slightly off or crooked position, it would throw off the position and size of the gray cut-outs. As a result, this one took me much longer to do than the black cut-out piece from my previous post.


Friday, October 26, 2012

2 Value Still Life

So for this assignment we had to draw a still life in only 2 values, black and white. The key to this assignment was making a balanced composition. However, we now had two things to pay attention to. One was the rule of thirds. The other was the ratio of black to white and the way the black shapes lined up with each other. This is the composition I ultimately settled on.

First I had to draw out the composition in charcoal:


Then I had to make the same composition, except we had to use cut paper, in this case, black paper pasted on white paper:


Wednesday, October 24, 2012

Some Other Kinds of Drawings

In the last post I showed you some sketches we did during class. The purpose of those sketches was to practice pentimenti, which is basically a fancy word for sketching. The key to pentimenti is that you leave the construction lines that you used to get correct proportions and position in a drawing. Then you go over your final lines a bit darker. It's not supposed to look finished, so it looks pretty messy:


We also had to make a negative space drawing of whatever still-life we were doing, which you can see next. Smearing all that charcoal over the drawing to create a solid black was pretty messy business!


Monday, October 22, 2012

Sketches from Drawing Class

Here are some sketches that I did during drawing class. They were practice for larger projects that my teacher assigned for homework over the weekend. I'll be uploading those  finished projects next.


Friday, October 19, 2012

The Big 7"x7" Finale! It's a Pattern!

After creating all those textures from the last post, we had to pick one to make a pattern out of. We had to experiment in Photoshop with rotating, flipping, and sliding the 7"x7" squares around in a 4x6 grid. I tried a bunch of different possibilities, but I only picked two for my final designs (we could do one more for extra credit). Here they are:


Wednesday, October 17, 2012

7x7 Step 2

Remember how I said you weren't done seeing that 7x7 design? Well here it is again, but this time we had to add value into the white areas with micron pens. We also had to create a variety of textures with the value. Honestly, it wasn't my favorite project for a couple reasons. Number one is that creating value with micron pens is insanely tedious and time consuming, which is not the way I like to work. I also wasn't too crazy about the results. I wasn't really happy with any single design, but hey, I suppose I can't expect every project to come out the way that I want it too.


Monday, October 15, 2012

Final 7x7 Design

In my last post, I showed you the nonobjective contour sketches that I did. Here's the final project that came out of it:


This is the 7x7 square mounted on a 10x10 piece of bristol board. We were being graded not only on the design, but also on craftsmanship  so I spent a lot of time making the lines crisp and clean. Below is the same design, scanned into the computer, with some editing in Photoshop to increase the contrast.


Although this was counted as an individual project, you have not seen the end of this design. There are two more projects to come that use this as a building block, so expect to see more of it!

Saturday, October 13, 2012

Update!

Hello everyone! I know the blog has been pretty dry the last couple of weeks due to mid-terms here at SCAD, but that's about to change. I've generated a lot of artwork since my last post so I'm hoping to start posting again by Monday. I'm hoping to keep a steady stream of posts going until the end of the quarter, which is around mid-November. After that, I'll figure out what to do while I'm on winter break. So keep checking the blog! Lots of good stuff to come :)

Friday, September 28, 2012

Nonobjective Contour Drawings

My second Design project was to zoom in on an object really close and make a contour drawing of what I saw. We were supposed to focus on making a dynamic, balanced, asymmetrical composition, as well as utilizing the rule of thirds and diagonals. These are the twelve contour drawings that I did of various objects:

This is a complete view of one side of the paper. There are 6 more on the other side, which you can see in the details below, but I forgot to take a picture of the other side as a whole.

The following 2 drawings are of a twisty lightbulb, or whatever you call them (the eco bulbs). Out of all the 12 drawings, the one of the left is the one that I personally like best.


Out of the following 2, my teacher liked the one on the right best out of the 12, so that's the one I ended up going with for my final project, even though I like the twisty lightbulb one above best.


After developing these contour sketches, we had to pick one and turn it into a black and white composition using black micron pens and a black copic marker on bristol board. We had to focus on creating balance by making certain shapes and lines black while keeping other shapes and lines white. I picked the one the teacher liked best. It was a fun project, but I really wanted to do the twisty lightbulb one. if I have time I might do that one for myself. I'll have to upload the final project later after the teacher grades it because we had to hand it in earlier this week and I didn't have a chance to photograph it yet.

Wednesday, September 26, 2012

Alphabet Photography

The first assignment for my Design class was to walk around Savannah and find the entire alphabet as it naturally appears. Basically we had to look around us at the buildings, the sidewalk, the trees, and whatever else we saw, looking for shapes that looked like the letters of the alphabet. We then edited the pictures in Photoshop and arranged them on an 18in X 24in poster, which was then printed at the college design center. I kind of rebelled a little bit, because my teacher had really strict guidelines about the margins around the edges. Her requirements were that the top and side borders had to be 1/2" but the bottom was supposed to be between 3" and 4." I thought that looked awful and unbalanced, so I made the top and side margins slightly larger and the bottom margin around 2 1/2". After all, I was paying to get it printed (that's college for you), so I didn't want to pay for something I didn't even like. This is what it looks like:


Tuesday, September 25, 2012

"Into Focus" Horses

The next thing we did in my drawing class after the ballpoint pen drawings was a charcoal drawing. My teacher called it an "Into Focus" charcoal drawing because of the method we used to draw. First, my teacher started with an extremely blurry image on screen. It was literally a big gray blob and a big black blob. As my teacher changed slides, the image slowly came into better and better focus. By the end of class (2 1/2 hours later), this is what I had:


The assignment for the weekend was to finish the drawing. So I spent another 7-10 hours finishing all the details. This is how it came out:


So now that you've seen my drawing, here is the actual picture that I was working off of:


Hope you enjoy the artwork!